QuickBooks Online Bill Pay Service is one of the most inevitable parts of your business accounting. If you are running your business, you will certainly need to track and pay your bills and gather useful insights for effective decision-making. Besides, it is crucial to make timely payments to your vendors and suppliers, not forgetting the business rents and wages.
Tracking different bill payments, amounts, and vendors at the same time can be a daunting yet important task. Thanks to QuickBooks Online Bill Pay service, which allows business owners to gain better control over their bills so that their tedious burdens can be removed and they can flourish seamlessly. In this post, we are going to discuss the QuickBooks Bill Pay feature and how you can use it with the utmost efficiency.
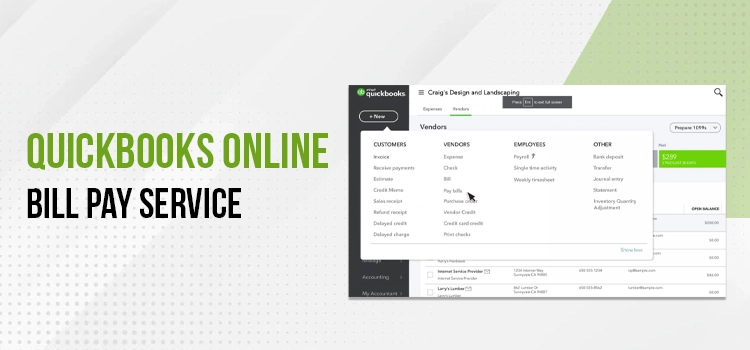
What Is QuickBooks Online Bill Pay Feature?
For a smooth operation of your business, your billing process must be streamlined. It includes recording and payment of the bills. QuickBooks Bill Pay automates the recording of the bills and lets you pay them with ease. It is a new built-in solution designed for small business owners who use QuickBooks for their day-to-day business accounting processes.
You can deploy this single-stop bill payment solution to pay bills in QuickBooks Online without looking any further. There are several pricing plans for the Bill Pay service you can choose based on your specific requirements. Once a plan is chosen, you can connect your customers and vendors, receive invoices, and get your bills generated automatically.
QuickBooks Online Bill Pay Pricing Plans
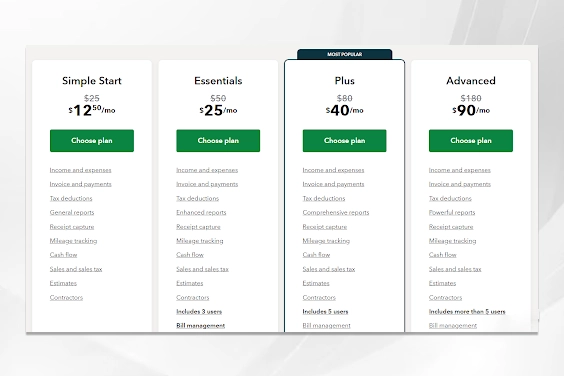
Now that you are aware of the Bill Pay utility in QuickBooks Online let’s discuss the different pricing plans you can choose for your business.
1: Basic Plan
The Basic plan comes for free, and you don’t need to spend even a single penny for this. Apparently, the free version offers very limited bill payment features. For instance, it includes 5 free ACH payments per month. Besides, it includes automated bill creation and auto-match transaction features, all for free. After five free ACH payments, you will have to pay $0.50 per transaction. Besides, the check payments will cost you $1.50 per transaction.
2: Premium Plan
Next comes the Premium plan, which you can access for $15/month. However, you can enjoy a 50% discount on pricing for the first three months, which makes it $7.50/month. Once you take the plan, you can make 40 free ACH payments per month. It has all the features of the Basic version, including unlimited 1099 filing (used to report the payments made to freelancers and independent contractors to the IRS). For extra ACH payments and check payments, the pricing is the same as in Basic, which is $0.50/transaction and $1.50/transaction, respectively.
3: Elite Plan
Elite Plan is the most advanced plan from QuickBooks Bill Pay service; you can subscribe for $45/month. For the first three months, you can access the tool for $22.5/month (50% discount). You can make unlimited free ACH payments without needing to pay any QuickBooks Online Bill Pay fees. With all the features of the prior plan (Premier), it offers additional features.
For instance, you can set user roles to ensure secure access to your data. Keep in mind that this feature is not available with QuickBooks Online Simple Start. Besides, you can also streamline your bill approval workflows with the QuickBooks Bill Pay Elite plan. ACH payments are free, but you will have to pay $1.50/transaction.
Bill Payments Feature in QuickBooks Online
Now that you know about the pricing plans, let’s delve into QuickBooks Online Bill Pay features you can harvest after choosing a suitable plan for your business:
Convert Invoices into Bills
You can import a bill into QuickBooks, and the program will auto-fill a bill for you. However, before saving it, you need to review it to ensure that everything is correct. Thus, you can save time and effort.
Schedule Upcoming Payments in Advance
You can schedule your future payments with ease so that they are no longer on your to-do list, and thus, you can manage your business accounting with fewer worries. They will be paid at the scheduled time.
Track Your Cash Flow
When you have all your bills in one place, you don’t miss them when they are due. Besides, you can also gain some useful insights to make better decisions for your business and gain better control.
Digital Records To Keep Your Data Handy
When you keep all your billing and payment-related data in one place, you can share it seamlessly with your team and accountant. Besides, it makes things easier for you when it is tax time.
How To Choose Payment Mode For Vendors/Contractors
Choose a preferred method to pay bills online from QuickBooks Desktop to your vendors and contractors, and the program will help you send checks or bank deposits. If a vendor prefers a paper check, QuickBooks will write it and send it on your behalf.
Keep Your Record-Keeping Organized
Whenever you make a payment to your vendor or contractor from within the program, QuickBooks will record this transaction for you. Besides, it also matches the transactions in your book to maintain a comprehensive record.
Setting up Pay Bills In QuickBooks Online in Simple Steps
QuickBooks Bill Pay is an incredible utility you can use to make ACH bank payments and send checks to your vendors or contractors with the utmost ease. It doesn’t require your recipients to set up anything. You need to provide your bank information in QuickBooks, and the program will get it done for you. Setting up Pay Bills In QuickBooks Online helps users put all its excellent features to use to simplify their billing processes. Below is how you can set up Bill Pay for QuickBooks Online:
- First things first, you need to sign into your QuickBooks Online company file to initiate the setup procedure.
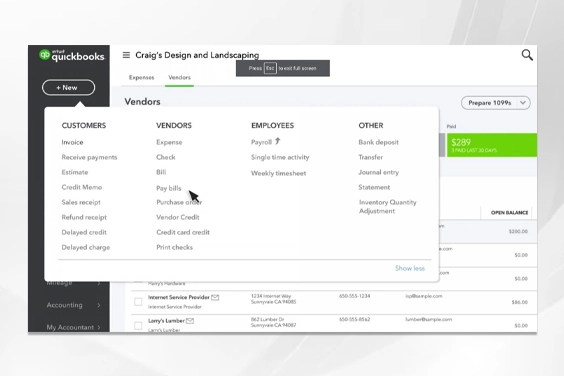
- After a successful login, select the Get Paid & Pay option, followed by selecting Bills.
- Here, you can create a new bill or select an existing bill which is not paid yet.
- Moving ahead, select Schedule Payment.
- Alternatively, you may also select the Save and Schedule Payment option based on what bill you are reviewing. For instance, if you are creating a new bill, clicking on the Save and Schedule Payment option will schedule it right away.
- In case the bill is unpaid, you can schedule it directly by navigating to Expenses, Vendors, or Bills options.
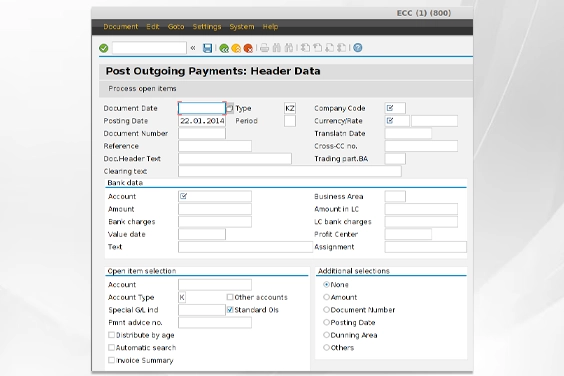
- Now, choose a bank you want to initiate the payments and withdraw funds from. You can either choose a connected bank account or choose Add a bank account option.
Additional Steps:
- After selecting/adding the bank account, you will see the full amount of the bill by default. However, you can select the Edit option to change this amount and schedule a partial payment.
- Using the Payment account in QuickBooks drop-down list, select the corresponding account from your QuickBooks Online chart of accounts. Thus, you can get your payment information synced accurately into QuickBooks Online.
- Alternatively, you can select the +Add New option to create a new account in QuickBooks Online and track your payment information within this newly added account.
- Now, in the specified area, choose a preferred payment method from your vendor.
- Moving ahead, you can select a Withdrawal Date when you want this withdrawal to take place. You can set a date up to 90 days in advance, but before that, you can’t schedule a withdrawal.
- You can now select the Schedule payment option after ensuring that everything looks good.
Following this QuickBooks Online Bill Pay tutorial, you can set up this utility and make your billing and payment processes accurate and effortless.
QuickBooks Online Bill Pay Not Working – What To Do?
Setting up QuickBooks Online Bill Pay lets you make payments with ease, schedule your bills in advance, and keep track of your financial transactions. But imagine a situation wherein you are trying to pay a bill with the tool and notice QuickBooks Online Bill Pay not working issue.
What will you do in such a scenario? Well, you should look into the nature of the errors you are receiving and their apparent causes. Thereafter, you can decide the right course of action to eliminate the persisting issue.
1: Try To Access QuickBooks Online Bill Pay In Incognito Mode
In the first place, you need to check if you can continue with a transaction in QuickBooks Online Bill Pay using incognito mode. The cache saved to your browser helps you load pages faster. However, when your cache gets piled up with time, it can affect your access to certain apps and features. To use the incognito mode in your browser:
- If you are a Google Chrome user – press CTRL + Shift + N keys together.
- On Safari, you can access private mode by pressing – ⌘ + Option + P simultaneously.
- When on Internet Explorer or Mozilla Firefox, press – CTRL + Shift + P.
If you are able to use QuickBooks Online Bill Pay in a private window, it shows that the browser’s cache is causing an error with this utility. To override this issue, you need to clear your browser’s cache by implementing the steps listed in the next solution.
2: Clear Your Browser’s Cache To Eliminate The Error
Clearing the browser’s cache can help users run web-based applications like QuickBooks with ease. To accomplish this task:
On Google Chrome
- Locate and click the Tools menu, represented by the three dots in the upper right corner.
- After that, you need to select the History option.
- Next, select Clear Browsing Data.
- You can select the Time Range for deletion. To clear the entire history, select All Time.
- Mark the checkboxes for Cookies and other site data and Cached images and files.
Once you are done, click on the Clear Data option. - After finishing the stated steps, close and reopen Chrome on your Windows computer.
- On an Apple system, you simply need to click the Quit option.
For Mozilla Firefox Users
- In Mozilla Firefox, locate and three-dot menu given for Tools.
- Next, you need to select the History option.
- In the next menu that shows up, select Clear Recent History.
- Now, in the Clear All History menu, you can clear the entire history by selecting the time range to Everything.
- Moving ahead, tick-mark the boxes for Cache, Cookies, Active Logins, Site settings, and Offline website data.
- After making the desired selections, click the OK button to finish.
On Safari or iOS
- Open the Settings app on your device.
- Now, move down to the Safari menu.
- Here, you need to scroll down to Clear History and Website Data and select this option.
- In the next screen, you need to confirm this deletion by clicking on the Clear History and Data option.
- When the clicked button turns grey, the job is done.
To Sum It Up!
This post explains all the crucial aspects related to QuickBooks Online Bill Pay utility. Hope you have learned how this utility can simplify paying bills in QuickBooks Online. Besides it also elaborates on setting up QuickBooks Online Bill Pay service. In case you find any difficulty in the execution of the steps or have any other queries, feel free to connect with an expert or access our Knowledge Center to get the desired help.
Frequently Asked Questions
When you schedule a vendor’s payment in QuickBooks Bill Pay, the program collect fund from the account added for the fund withdrawal. Thereafter, the payment is sent to your vendor using a preferred payment method.
By default, you will see the full payment. However, if you want to schedule the partial payment, you need to follow the below stated steps:
- Log into your QuickBooks Online company file in the first place.
- Thereafter, select Expenses >> Bills.
- Now, select Schedule Payment for the bill you want to pay.
- In the end, hit the Edit button, which allows you to enter the desired amount you want to pay.
You can schedule a payment 90 days prior to the due date. However, if you want to cancel this payment for some reason, follow the below-explained steps:
- The first step is to sign into your QuickBooks Online company file.
- Next, you have to select the Expenses option and then Bills.
- Once done, select Show Bill Pay payments to move ahead with the procedure.
- Now, choose the bill payment you have scheduled and select View Details.
- In the end, select Cancel this payment, to finish.
As you are not bound by any contract or term, you can unsubscribe to QuickBooks Bill Pay subscription anytime you want. Below are the steps:
- As your initial step, sign in to your QuickBooks Online company file.
- Next, select the gear icon to open Settings and then choose Account and Settings.
- Advancing in the procedure, select Billing & subscription.
- Here, you need to locate QuickBooks Bill Pay and then select Unsubscribe.